Who can launch a Quest or Education content on BuilderGym?
Everyone!How long it takes to launch a production ready Quest?
From 10 minutes to few hours depends on your content plan. But not days.How it works? How to create?
We have an admin panel it’s in beta now, but there are you can create, manage, monitor your quests, challenges, educations. Step 1: Access the Creator Mode- Navigate to app.buildergym.xyz.
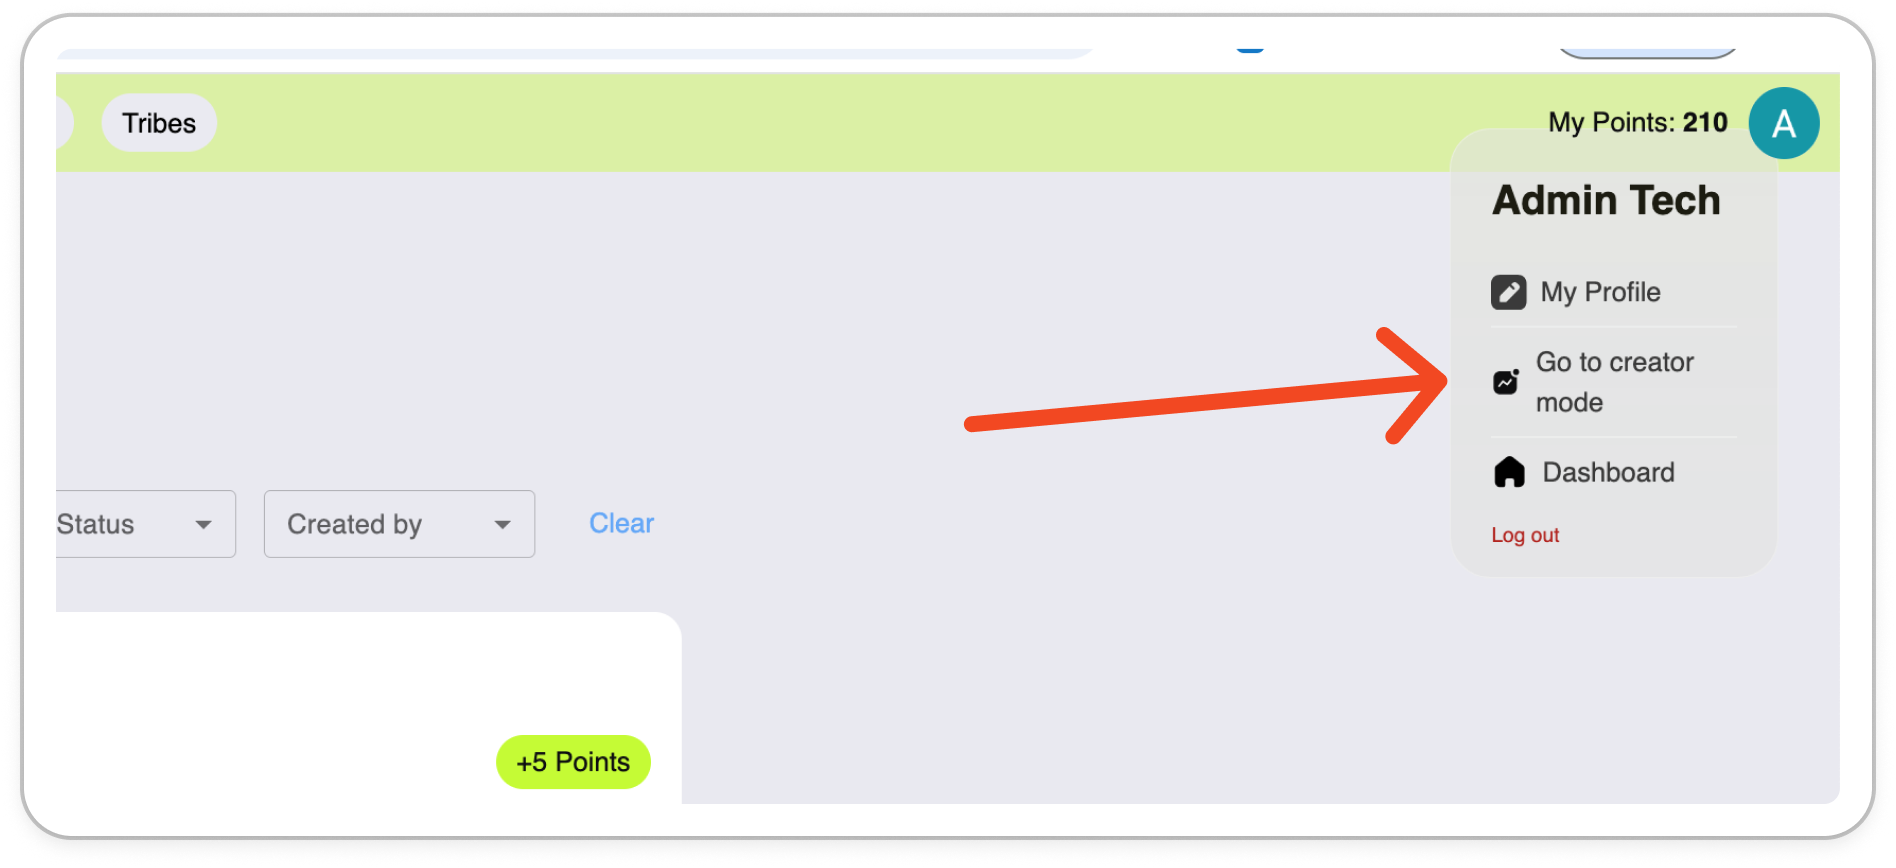
- Open the modal menu in the top-right corner.
- Select “Go to creator mode”, which redirects you to admin.buildergym.xyz.

- Sign in with your BuilderGym credentials (the same ones you used for registration).
-
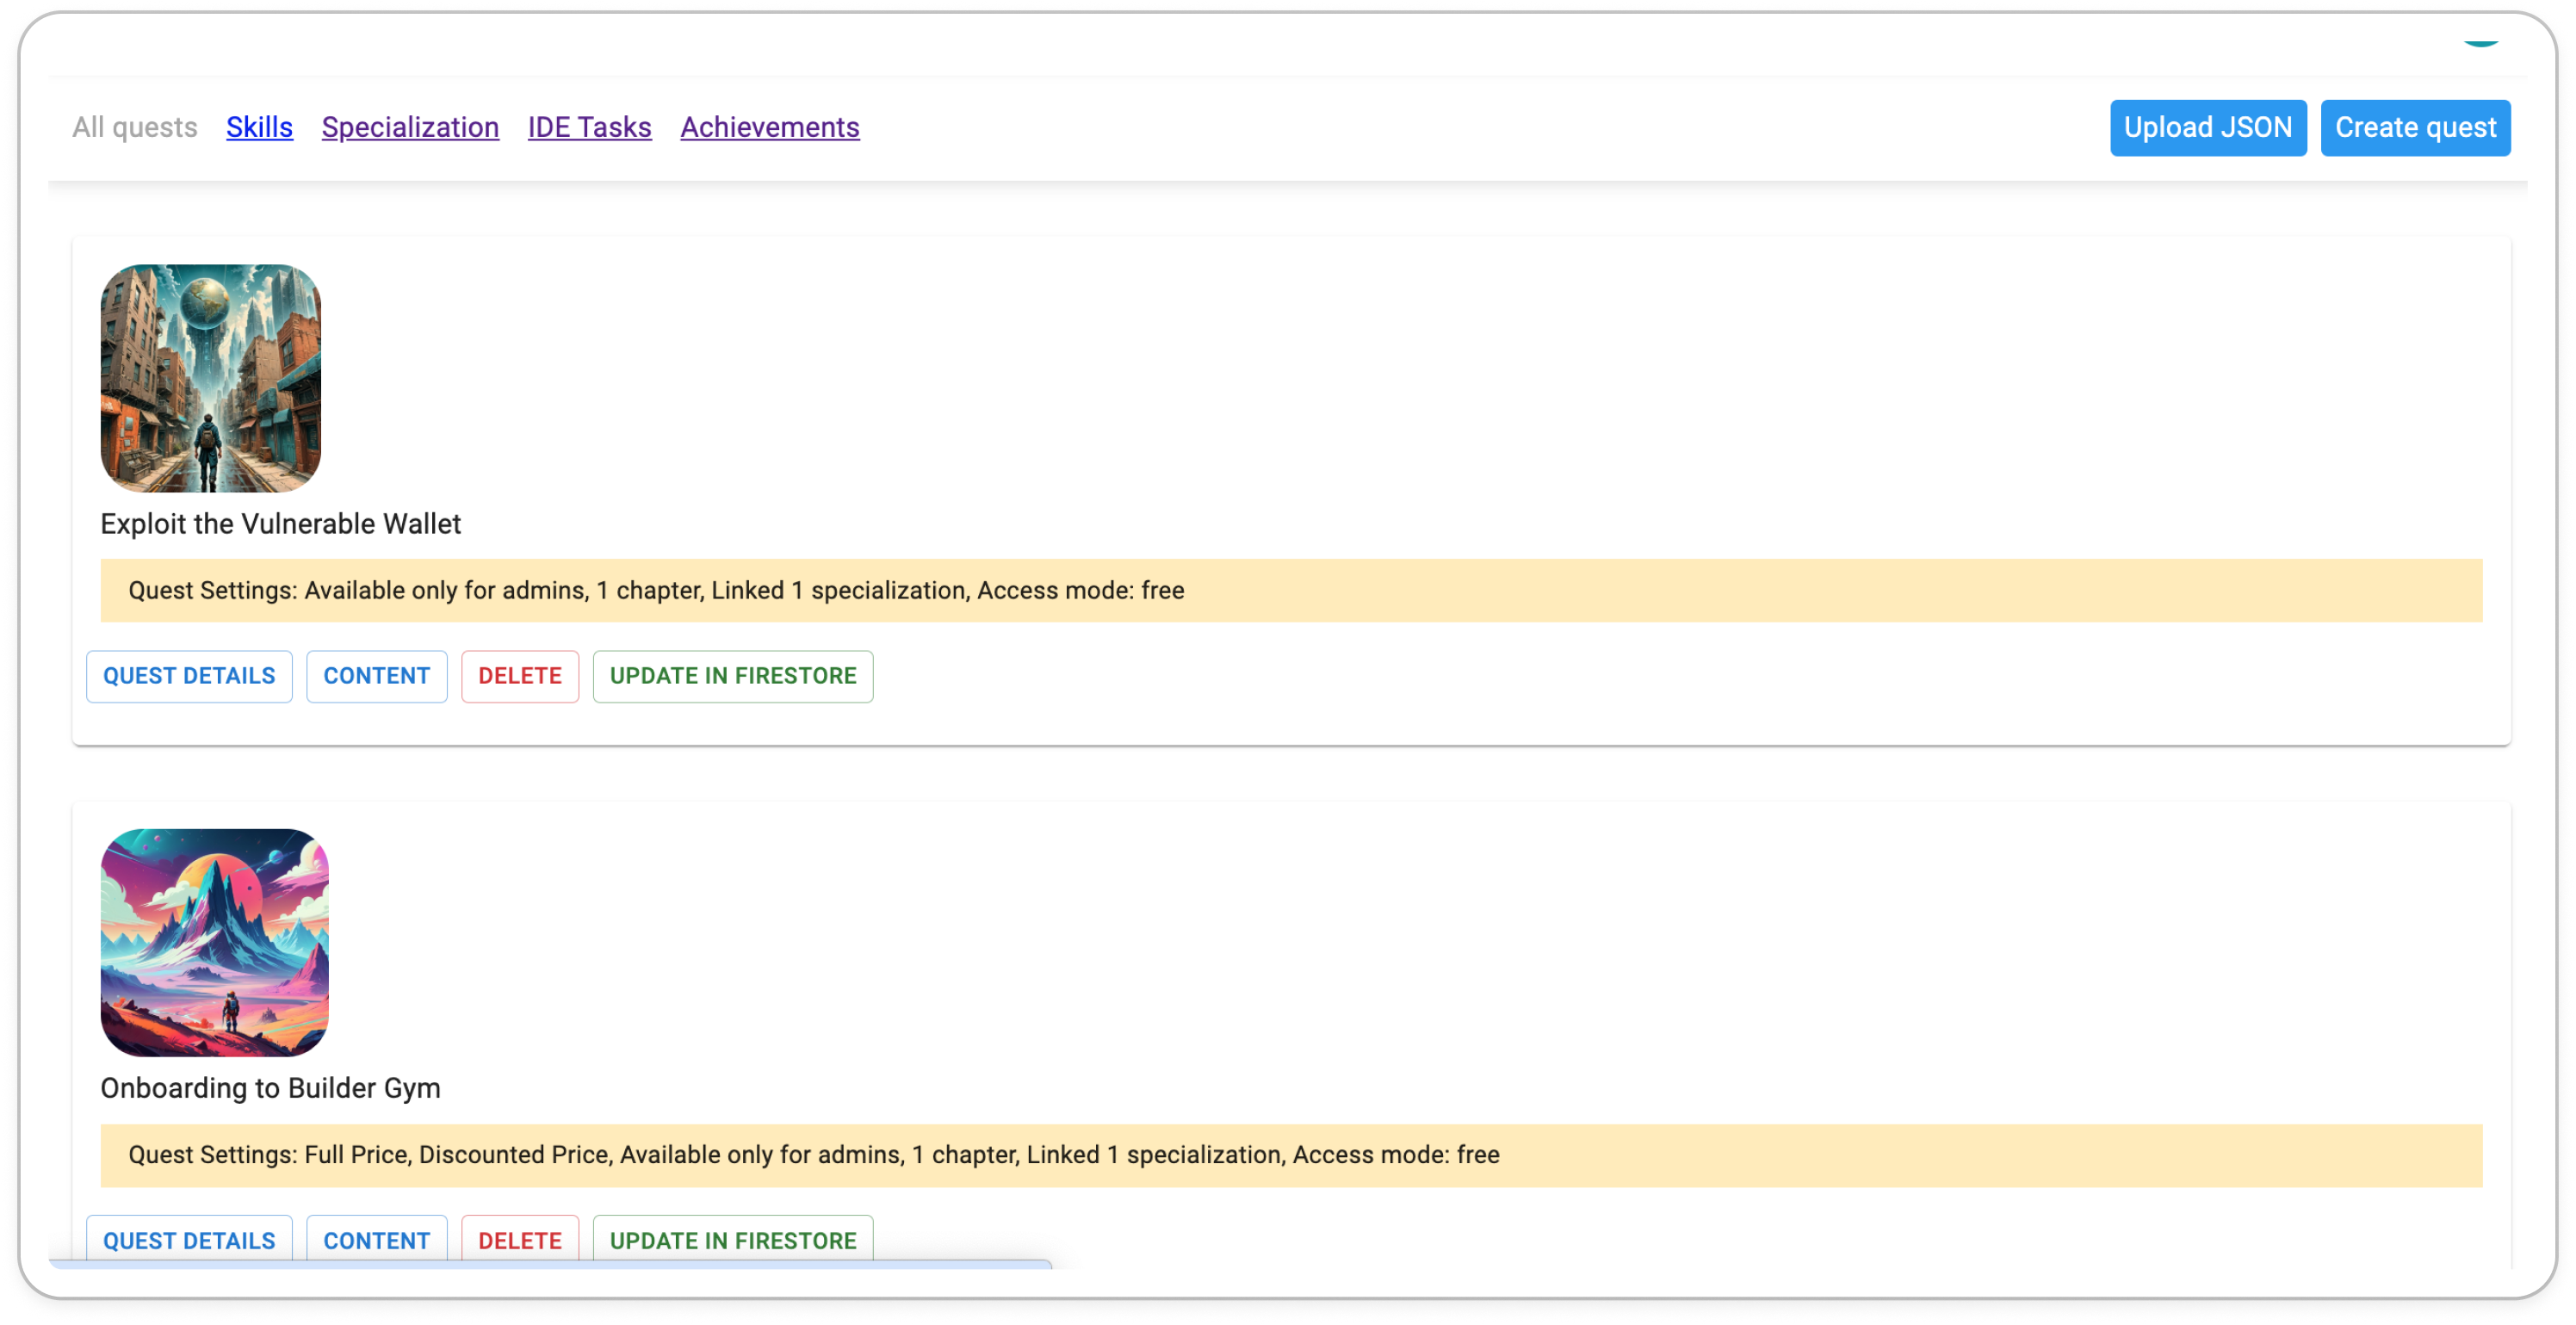
Once logged in, you’ll be redirected to the Creator Dashboard, where you’ll manage all
your quests.

- Click on the “Create Quest” button in the top-right corner of the dashboard.
-
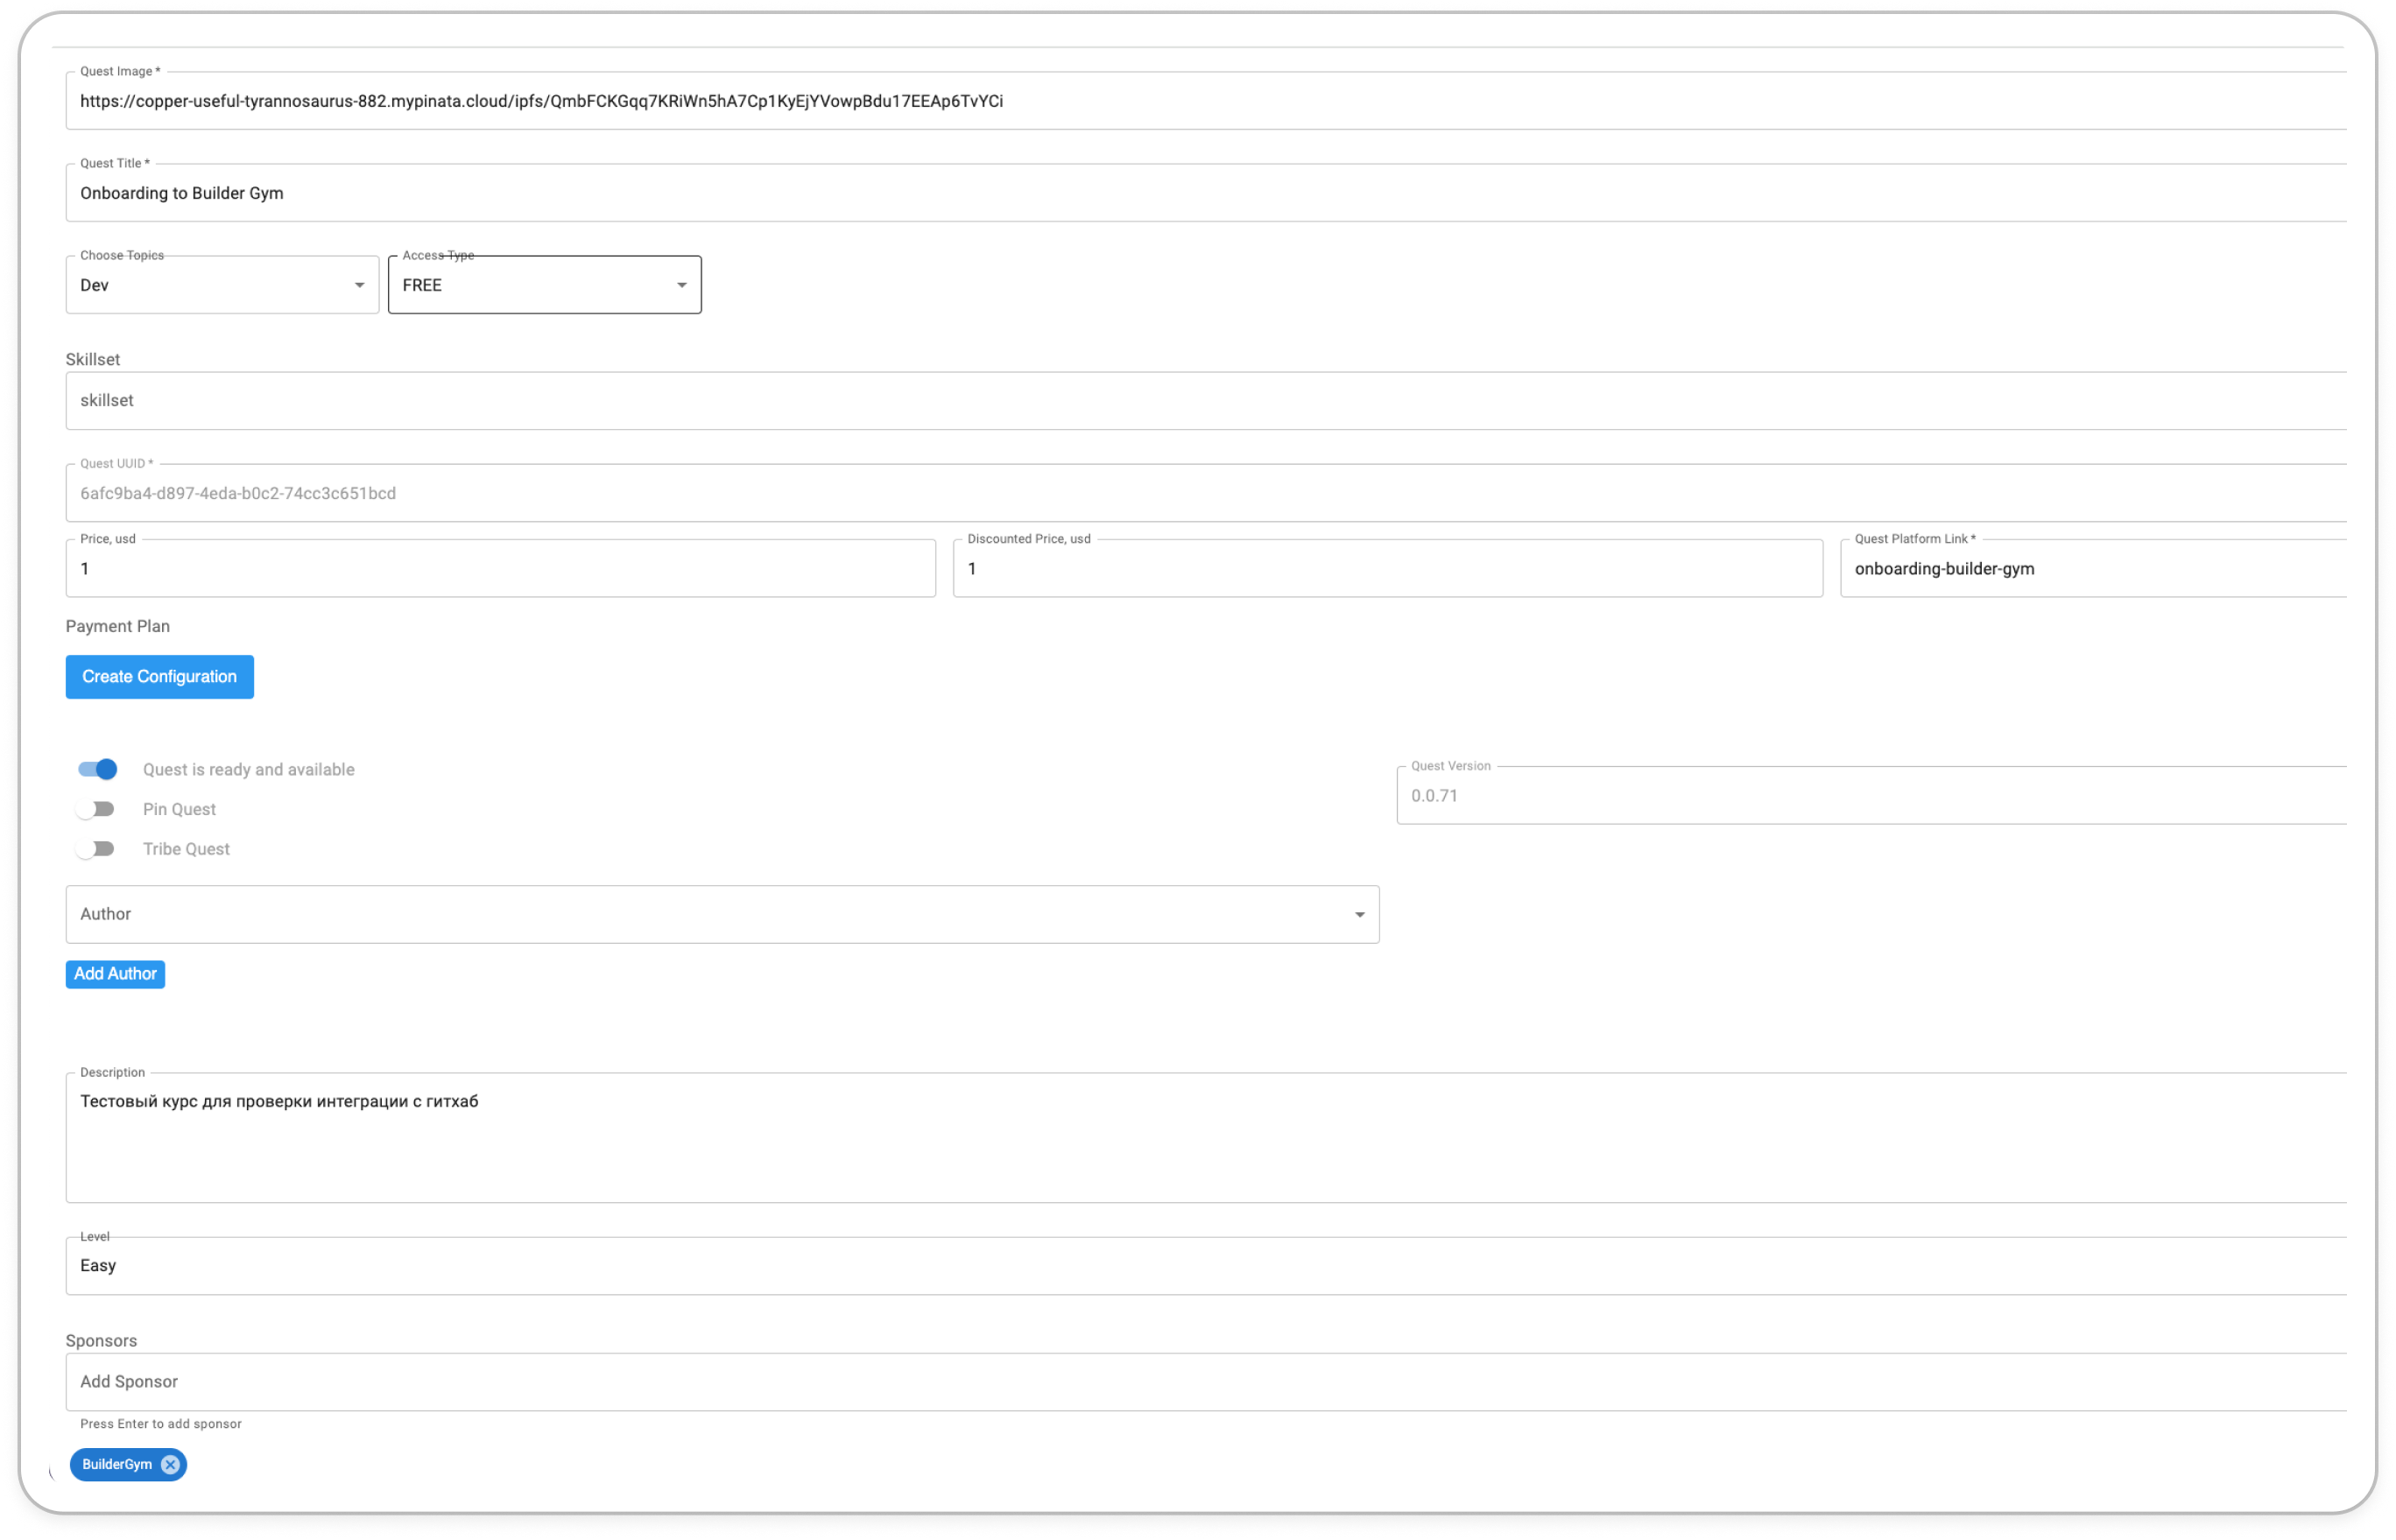
Fill in the required fields:
- Quest Title: The name of your quest, visible to users.
- Quest Link (Slug): A short, unique string that will be used in the quest’s URL.
- Optionally, complete the additional fields (UUID, image, availability, difficulty, etc.).
- Save your quest to return to the dashboard.
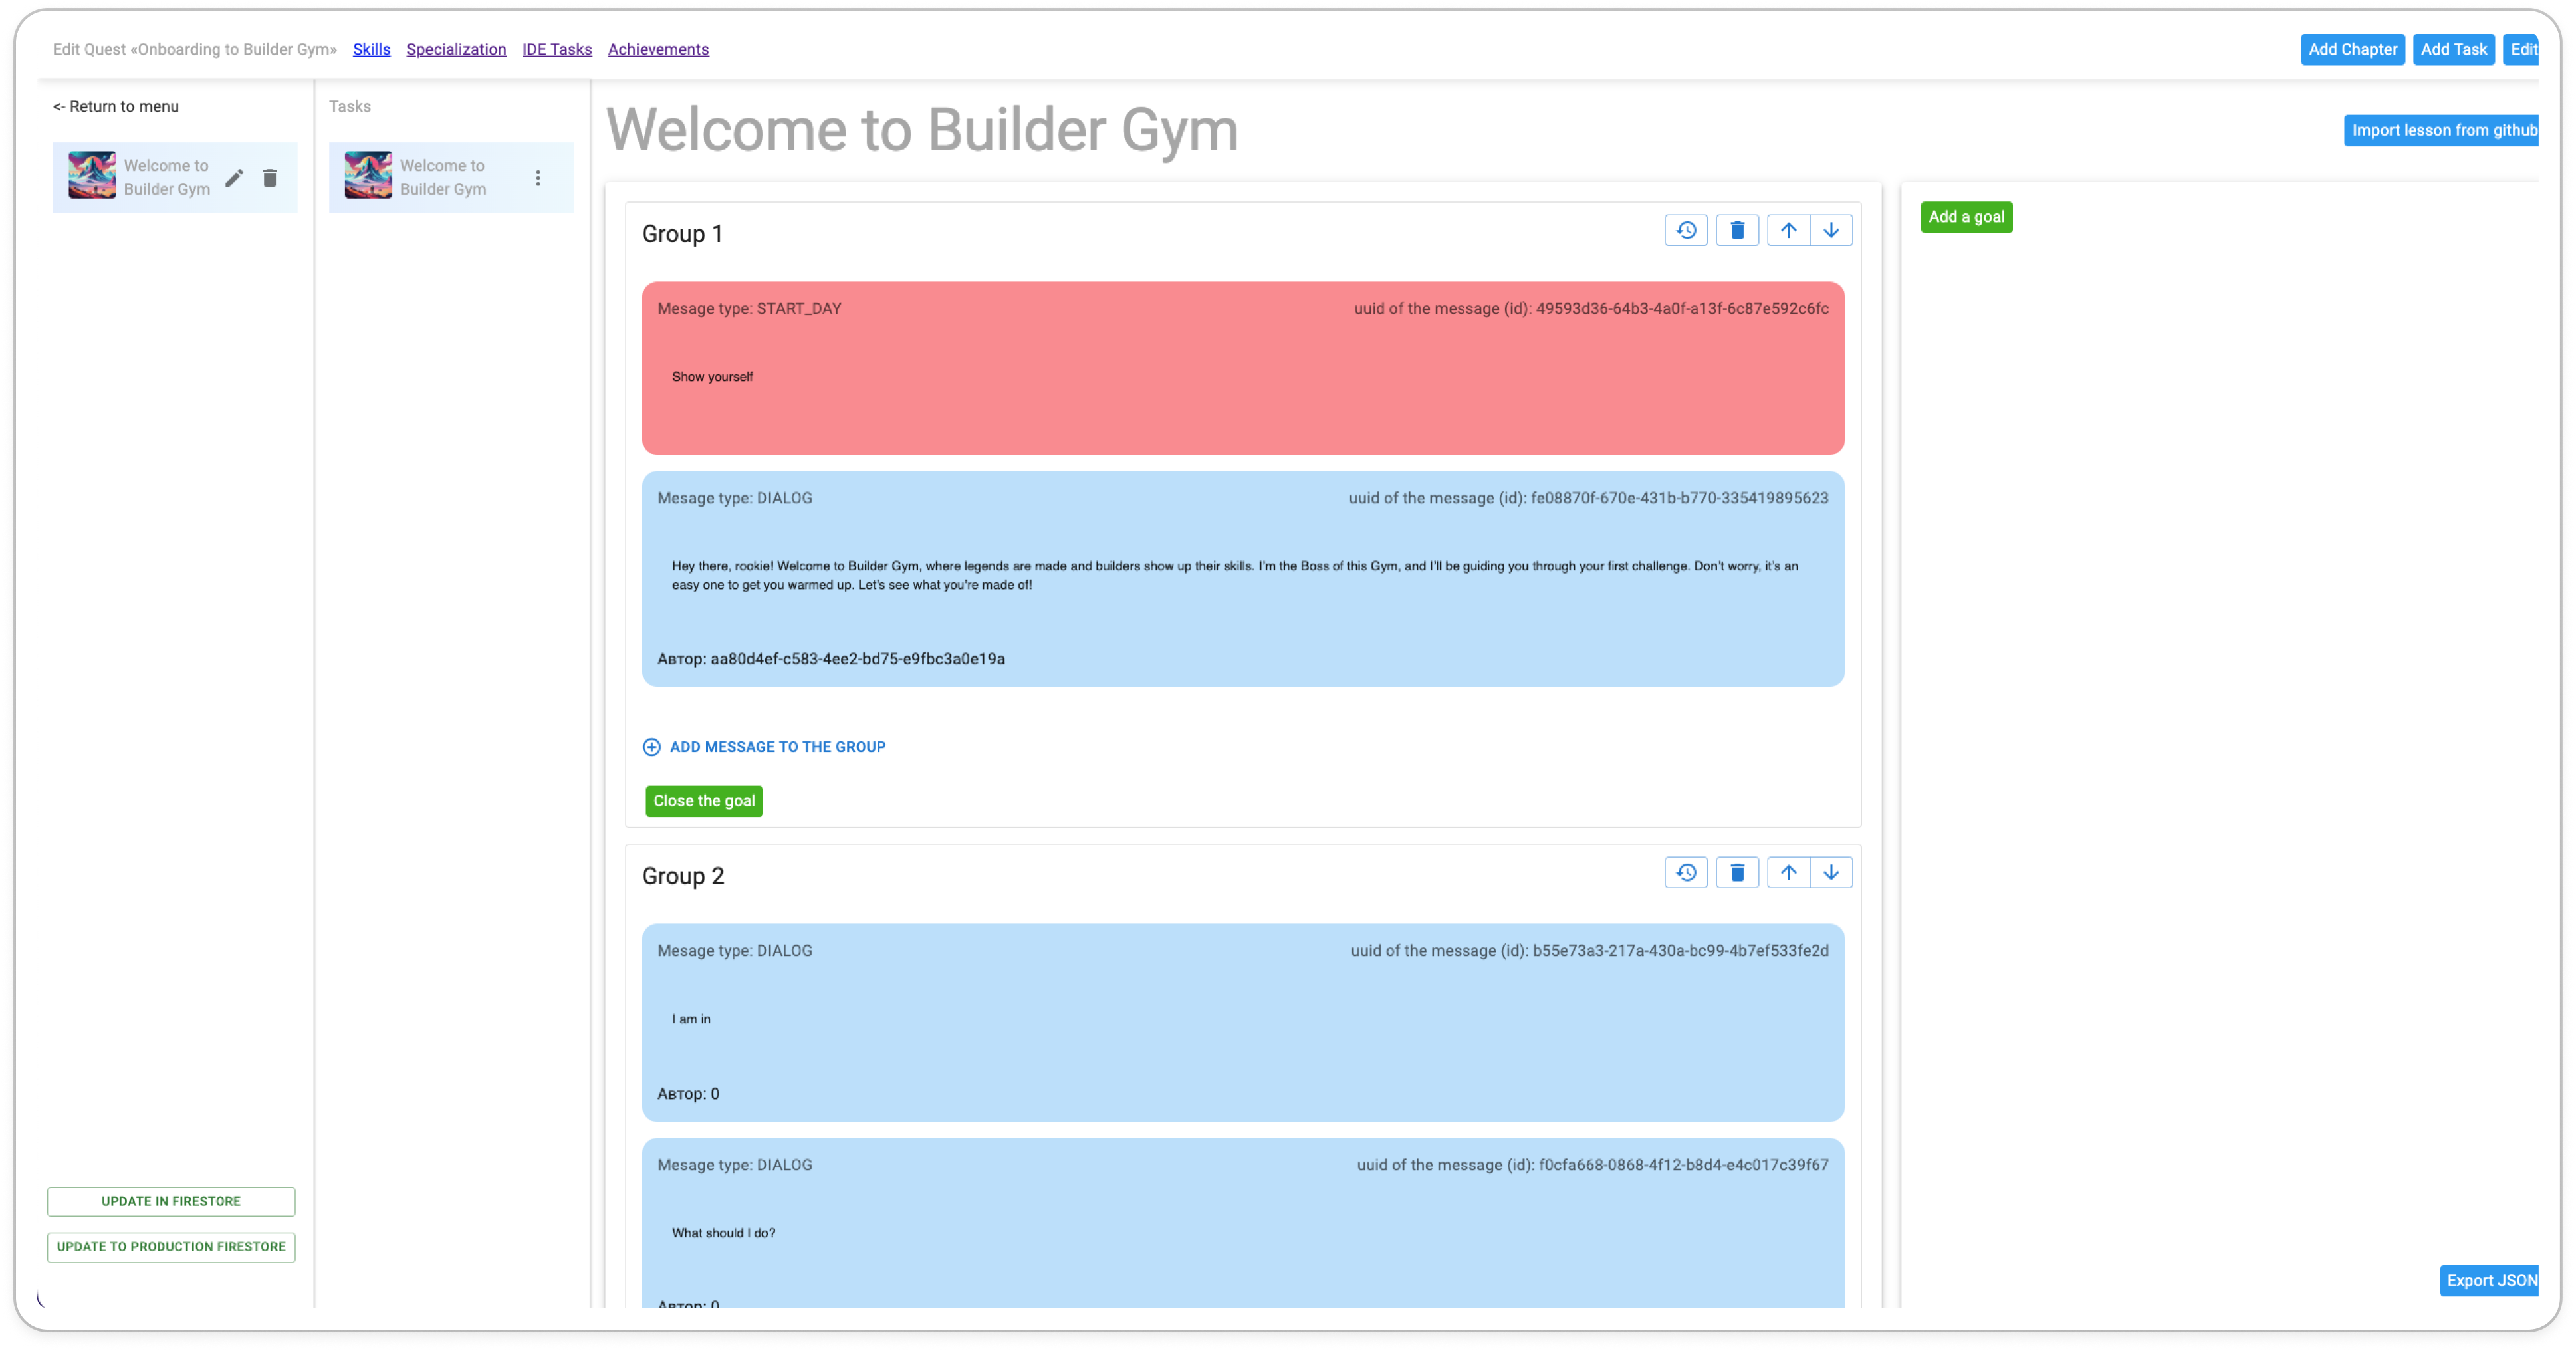
- From the dashboard, click on the newly created quest.
- Select the “Content” button to access the content editor.
- Click the “Add Chapter” button.
-
Fill in the chapter details:
- Chapter Name (required): Provide a descriptive title for the chapter.
- Image URL (optional): Add a URL for an image to represent the chapter.
-
Save the chapter to return to the content list.

- Click on the chapter you just created to open it.
- Select the “Add Task” button.
-
Fill in the task details:
- Task Name (required): Name the task, explaining what users need to accomplish.
- Task Image URL (optional): Include an image URL if desired. 4. Save the task to return to the chapter content.
- Save the task to return to the chapter content.
- Select the task you just created.
-
You’ll see a Messages Panel in the center of the screen.
- Messages are the building blocks of tasks and contain the details and instructions users interact with
- Use the “Add Message” button to start defining the content of the task. (Details on message types will follow.)

Congratulations!
You just created simple quest or education course. Now go ahead and improve it, adding some interactive mechanics, images, coding tasks etcWhat Are Messages?
Learn what type of the messages exists and how to use it
Code Task
Code tasks provide users with programming challenges directly in an integrated development environment (IDE). Follow the steps below to create and configure a Code Task.

